The Hardest Part Isn't the Climb: How to Descend Rocky Mountain Trails Without Wrecking Your Knees (or Your Trip)
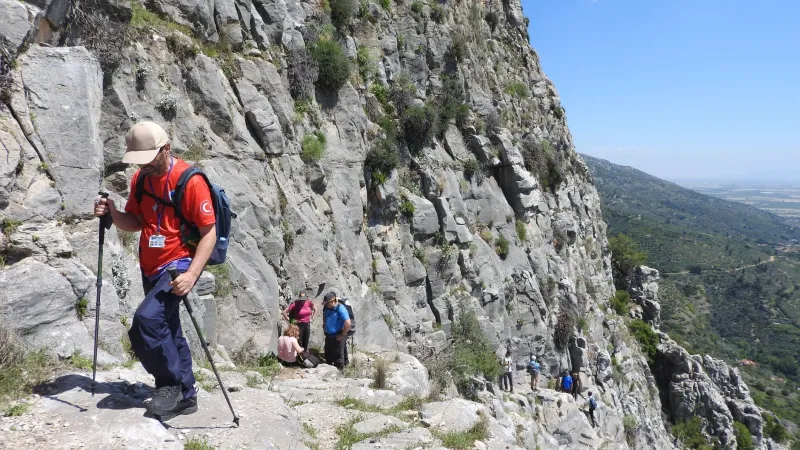
There's a moment every hiker knows — you've just tagged the summit, you've taken the photos, maybe cracked open a snack bar you've been rationing for two hours. The views are everything you hoped for. And then someone in your group says, "Okay, we should probably head back."
That's when the real work begins.
For all the energy we pour into preparing for the uphill push — training hikes, conditioning runs, researching elevation gain — the descent tends to get treated as an afterthought. It's just... going down, right? Except it's not. Search and rescue teams across Colorado, Wyoming, and Montana consistently report that a disproportionate number of trail injuries happen on the way back down. Twisted ankles, blown knees, falls on loose scree — the descent collects its dues.
"People summit and they feel great, they feel accomplished," says one Colorado-based mountain guide who leads groups through the San Juan and Front Range areas. "But their muscles are already taxed, their focus drops, and suddenly the trail they managed just fine on the way up becomes a completely different challenge."
So let's talk about what actually goes into a smart, safe descent — because your body, your knees, and your future hiking seasons will thank you.
Why Going Down Is Harder Than It Looks
Physically speaking, descending puts your muscles under a different kind of stress than climbing. The quads, in particular, are working eccentrically — meaning they're contracting while lengthening to control your body weight against gravity. That's more demanding than the concentric contractions you use on the way up, and it's why your legs often feel more wrecked the day after a big descent than they do after the climb itself.
Add in cumulative fatigue, dehydration (which is easy to underestimate at altitude), reduced glycogen stores, and the mental relaxation that comes with thinking the hard part is over, and you've got a recipe for sloppy footwork.
Then there's the terrain itself. Rocky Mountain trails don't get easier as you go. Loose rock, root networks, and eroded switchbacks are just as technical heading down as they are heading up — arguably more so, because your center of gravity shifts forward and your reaction time to unexpected obstacles decreases as fatigue builds.
Footing First: The Mechanics of a Controlled Descent
The single biggest adjustment most hikers need to make is slowing down. It sounds obvious, but the pull of gravity makes speed feel natural on a descent, and that's exactly the trap. Controlled, deliberate foot placement beats momentum every time.
Here are the basics that mountain guides drill into their clients:
Heel first, not toe first. On moderate terrain, landing heel-first gives you more surface contact and better braking power. On steeper or looser ground, shift to a flatter foot strike to distribute your weight more evenly.
Bend your knees — always. Locked knees on a descent are a fast track to joint damage. Keeping a slight bend acts like a shock absorber and gives you quicker response time if a rock shifts underfoot.
Shorten your stride. Long steps on a descent increase impact force and reduce your ability to adjust mid-step. Think small and controlled.
Face the slope on technical terrain. On steep, exposed sections — particularly on loose scree or wet rock — turning to face the hillside and moving more like you're on a ladder gives you far more control than trying to walk forward.
Use your poles. Trekking poles aren't just for looks. Planted poles ahead of you on a descent take a meaningful percentage of load off your knees. Studies have shown they can reduce knee-joint stress by up to 25 percent. If you're not already using them, this is the reason to start.
Reading the Terrain Before You Step
One of the skills that separates experienced mountain hikers from beginners is the ability to read what the ground is actually going to do under your foot before you commit your weight to it.
Loose scree — those small, sliding rock fields common above treeline in ranges like the Maroon Bells area or Rocky Mountain National Park — requires a shuffling, low-impact technique where you let the rocks move with you rather than fighting them. Wet granite becomes glass-slick. Trail surfaces that looked solid on the ascent may have dried out or been disturbed by other hikers by the time you return.
Shadowed sections of trail, especially in early morning or late afternoon, can hide patches of ice or frost even in summer at higher elevations. Always give shaded terrain an extra second of evaluation before stepping.
"I tell people to think three steps ahead," says one wilderness EMT who's responded to trail rescues in the Wind River Range. "Where is your foot going, where will the next one land, and what's your bailout if the first step doesn't go as planned?"
Managing Your Pack and Your Body
Your pack is a variable most hikers don't think about on the way down, but it matters more than you'd expect. A heavy pack shifts your center of gravity backward on a descent, which actually helps somewhat — but if you've consumed most of your water and food, your pack may be significantly lighter than when you started, subtly changing how your body handles balance.
Tighten your hip belt and sternum strap before heading down. Loose straps let the pack sway, which throws off your rhythm and forces your stabilizing muscles to work harder. If you've got any gear that shifted during the climb, redistribute it before you descend.
Hydration is another non-negotiable. Many hikers drink heavily on the ascent and ease off near the top, figuring the hard work is done. Don't. Your muscles need fluids to function properly on the way down, and dehydration accelerates the fatigue that leads to poor footwork.
If you're carrying snacks, eat something before you begin the descent — not when you're already halfway down and your legs are starting to shake. Keeping your energy topped off keeps your focus sharp.
The Mental Game Nobody Talks About
Fatigue isn't just physical. Mental fatigue on a descent is real, and it's sneaky. After hours of effort and the emotional high of reaching a summit, your brain wants to coast. Attention wanders. The internal narration that was carefully tracking every step on the way up goes quiet.
Building in a genuine rest before you descend — not just a five-minute photo stop, but ten to fifteen minutes of actual sitting and recovery — can reset your mental focus enough to matter. Some guides recommend a deliberate "reset moment" where you verbally acknowledge to yourself or your group that the descent requires the same respect as the climb.
Pace yourself with intention. Set mental checkpoints — a specific landmark, a trail junction, a certain elevation — and re-evaluate how you're feeling at each one. If someone in your group is moving erratically, stumbling, or seems checked out, that's the moment to slow down as a team, not push through.
Know When to Stop
Sometimes the smartest descent is a delayed one. If weather moves in, if someone in your group is genuinely impaired by fatigue or altitude, or if you've misjudged your timing and are looking at navigating technical terrain in low light, stopping and reassessing is always a valid call.
Carry a headlamp regardless of when you plan to be off the mountain — conditions change fast in the Rockies, and being caught on a technical descent in the dark is a situation that's entirely avoidable with a little preparation.
The summit is the headline, sure. But getting back down safely — that's the whole story.